
The flooring plays a pivotal role in the overall comfort, safety, and visual appeal of any home, so when you think your tile flooring needs a much-needed makeover, then upgrading them is an affordable way to give your abode a fresh look! But floor projects often come with a hefty price tag, so for weekend warriors looking to maximize their budget, going the DIY route may be your top choice.
You need more than a hammer and chisel to pry off tiles, especially for those that just won’t budge. If you’re wondering what you can do to get rid of your old tiles, then here’s what you should know before you pull up your sleeves and take on the daunting task yourself:
Steps to Consider When Removing Old Tiles that Won’t Budge
Step #1: Prepare the Essential Tools
Just like in any project, the first step to pry off your old, stained tiles is to gather all the must-have tools in your arsenal:
- A drill with a tile drill bit (or a diamond drill bit)
- Masonry hammer
- Wide or cold chisel
- A square-tipped spade
- A floor or mortar scraper
- A pry bar
- A high-powered vacuum
Remember that you need a tile drill bit to create deeper holes on tough tiles, while you need a diamond drill bit for ceramic tiles.
Step #2: Cover Your Furniture to Protect It From the Mess
Removing tiles is a messy project that can leave debris and smokes of dust everywhere in the room. With that in mind, it’s important to cover all furniture with plastic wrap to avoid trapping dust on them. Don’t forget to cover the air vents too, or else all the dust will circulate throughout your home and leave even bigger disarray.
Step #3: Wear Protecting Clothing and Gear
Working with tile floorings can be hazardous than meets the eye since the sharp edges of the material can cause cuts, lacerations, punctures, and other injuries. That’s why you also need to invest in protective equipment like a pair of goggles, a face mask, and abrasion-resistance footwear, especially when handling drilling machines when tearing away at your old tiles.
Step #4: Clean Grout
Once you’re donning protective gear and clothing, you can scrape off the grout from your tiles. It’s a challenging step since you have to make sure that you won’t damage the surrounding tiles in the process.
Using a utility knife is the safest way to remove grout without putting other tiles at risk, though it can also be the most time-consuming compared to using power tools like a rotary grinder.
Step #4: Remove the Trim Work
Moving forward, you can carefully pry off the time work using your utility tool to slice away at the hardened paint that’s gluing the tiles together. Once you cut through the caulk, you can insert a putty knife to loosen the trim and push it enough to leave enough space to insert your pry bar to wiggle apart the trim work.
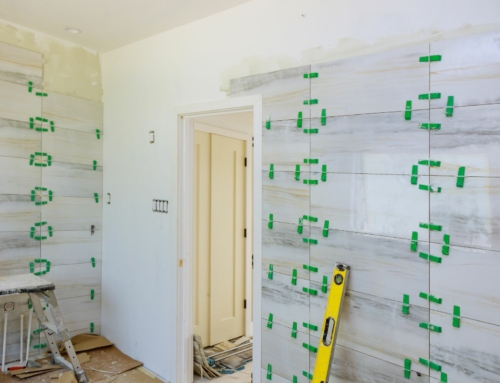
Step #5: Drill and Remove the Tiles
Once the grout and trim work are gone, it’s time to drill away at your tiles and chip away at the undersides to break them up. Be sure to start at the center of the room before advancing towards the sides and edges to make the process easier to handle.
The Bottom Line: Should You Hire a Professional or Remove Floor Tiles Yourself?
Removing floor tiles is a tricky and messy project, especially when they’re stubborn to handle. After all, there are a lot more complications that can happen throughout the process that even the most seasoned DIY-er might have trouble solving.
In that case, it’s always safer to seek professional assistance from a qualified, licensed installation contractor so you can get your room renovation done in no time with little-to-no issues along the way.
Why Choose Miconi for Your Home’s Flooring?
If you’re looking for a colorful selection of high-quality flooring, we’re the best marble and tile contractors that can elevate the look and feel of your space in more ways than one.
We offer a wide range of natural stone and tile products, from pet-friendly tiling to expansive commercial installations. Get in touch with us at 415-482-8453 and see what we can do to transform your space from floor to ceiling!
